
The Secret to Silky Microfoam and Perfect Pours
Why Getting Latte Froth for Pour Right Changes Everything
Latte froth for pour is the single biggest factor separating a flat, forgettable coffee from a silky, café-quality drink you actually want to Instagram.
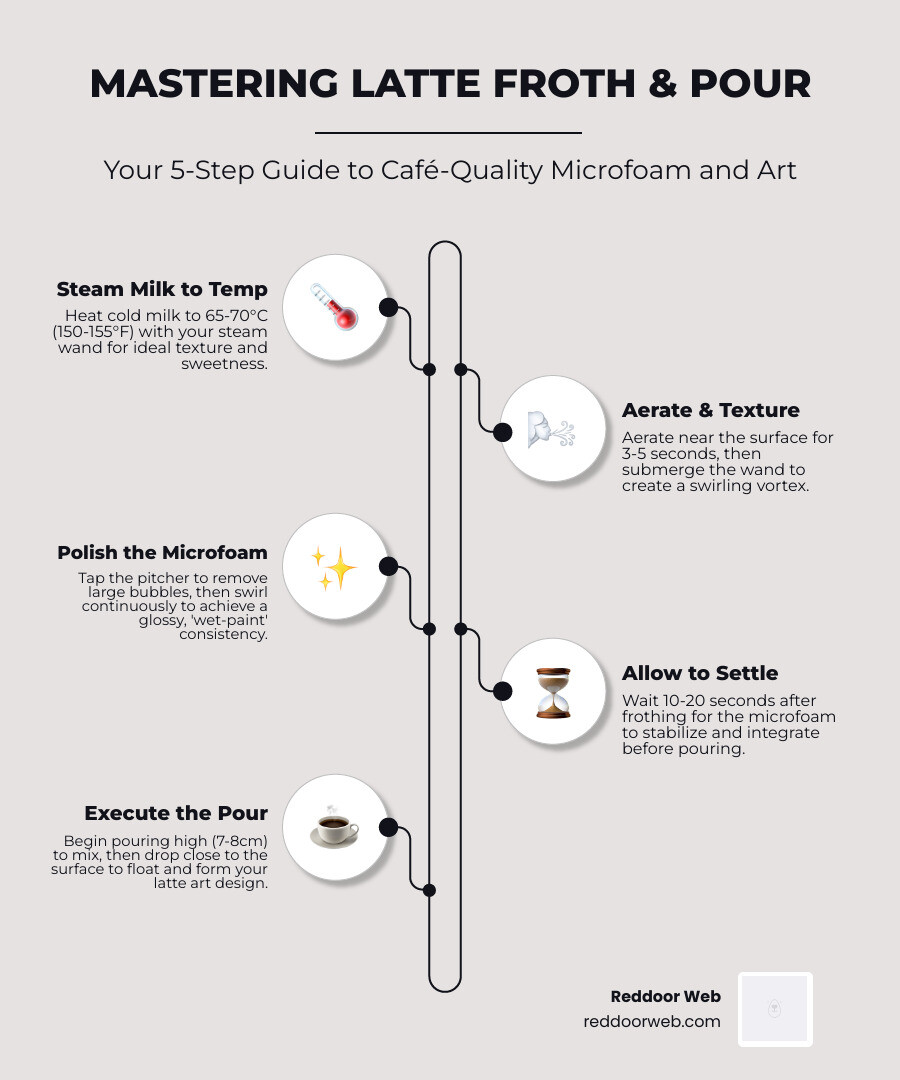
Quick answer — here’s what great latte froth for pouring requires:
- Steam cold milk to 65-70°C (150-155°F) using a steam wand
- Aerate first (3-5 seconds near the surface) then texture (create a vortex)
- Tap and swirl the pitcher to polish the foam to a glossy, wet-paint finish
- Wait 10-20 seconds after frothing before you pour
- Pour high first (7-8cm) to mix with espresso, then drop low to float your design
Most home brewers nail the espresso. The froth is where things fall apart.
Too many bubbles. Wrong temperature. Foam that separates before the pitcher even reaches the cup. Sound familiar?
The good news: perfect microfoam is a learnable skill, not barista magic. It follows predictable rules of physics and temperature — and once you understand those rules, consistent results follow.
One thing that makes this click for a lot of people: think of properly frothed milk as wet paint. It needs to be fluid enough to flow, but thick enough to hold a shape on the espresso crema. Get that texture right, and the pour almost takes care of itself.
This guide walks you through every step — from why microfoam works the way it does, to exactly how to move the pitcher to create a heart or rosetta.
Understanding Microfoam: The Foundation of Latte Art
To master latte froth for pour, we first need to understand what we are actually trying to create. In the coffee world, we call it “microfoam.” This isn’t the stiff, dry foam you might find on a 1990s-style cappuccino that sits on top of the coffee like a cloud of soap bubbles. Microfoam is a liquid-foam hybrid where the bubbles are so tiny they are invisible to the naked eye.
The Science of the Shine
When we steam milk, we aren’t just heating it up. We are engaging in a bit of kitchen chemistry. According to Scientific research on milk protein and foam stability, the process involves “denaturing” milk proteins. As the steam wand introduces heat and air, the proteins unfold and wrap themselves around air molecules, creating a stable structure.
The fats in the milk also play a role, acting as a stabilizer that gives the foam its creamy mouthfeel. This is why whole milk is often the gold standard for beginners; the balance of protein and fat is incredibly forgiving.
The Visual Cues
How do you know you’ve achieved the right latte froth for pour? Look for these three characteristics:
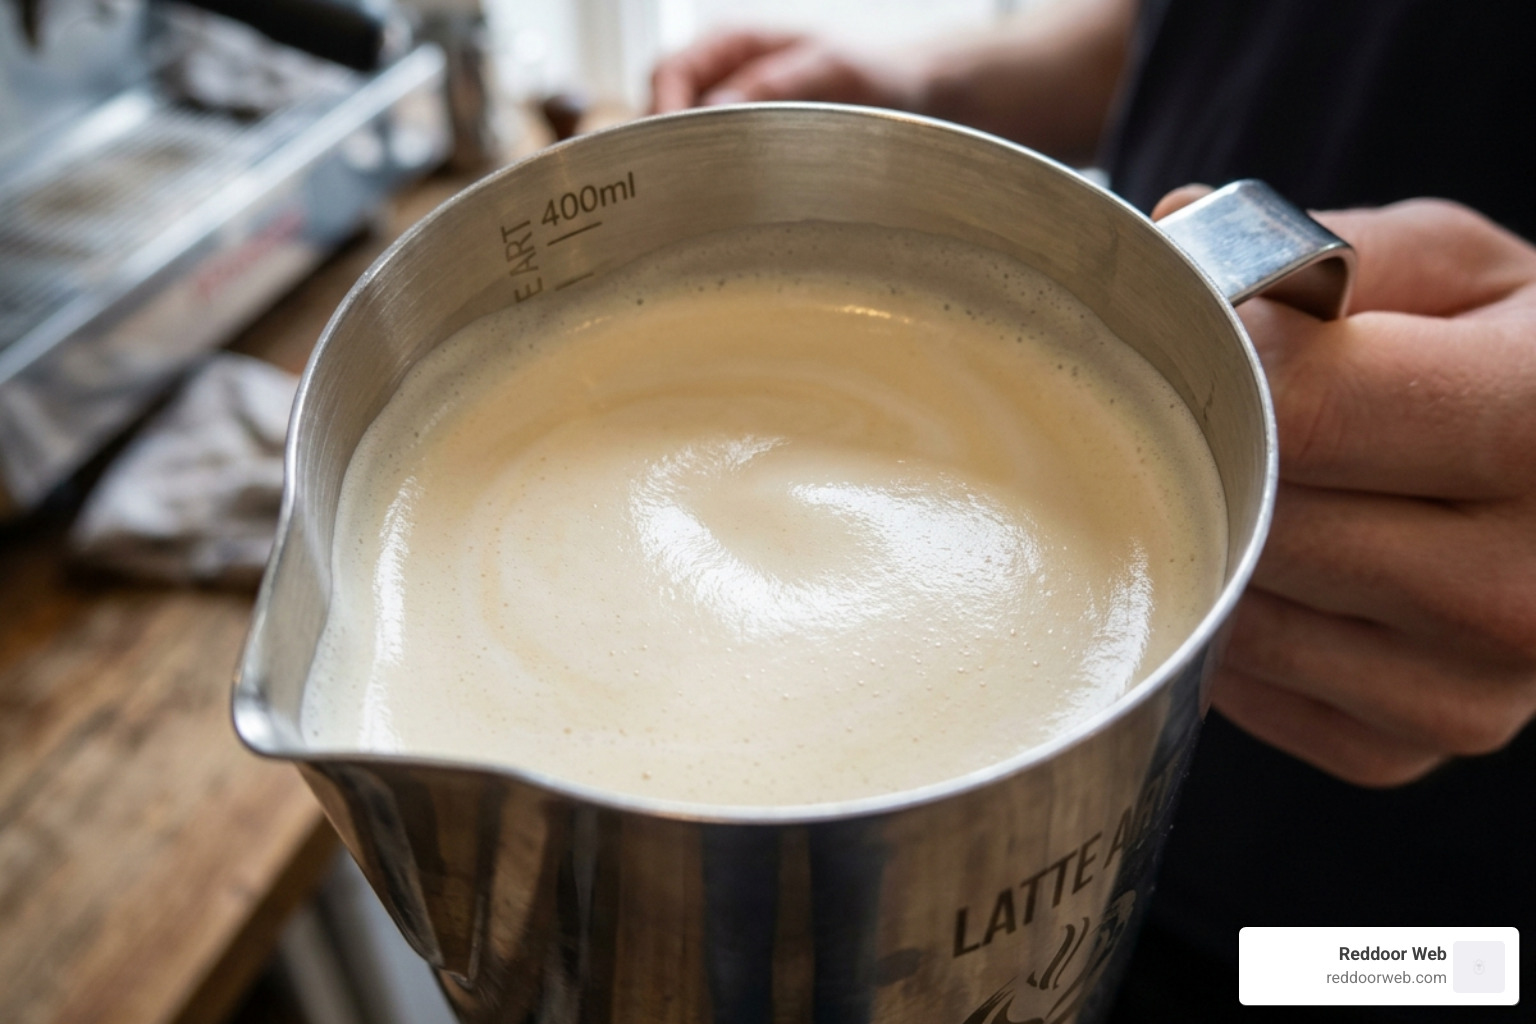
- Glossy Sheen: The surface should look like satin or freshly poured wet paint. If it looks matte or dull, you’ve likely over-aerated it or let it sit too long.
- 20-35% Expansion: For a latte, we want the milk volume to increase by about a quarter to a third. If you double the volume (50% expansion), you’re moving into cappuccino territory, which is often too thick for delicate art.
- Uniformity: There should be zero visible bubbles. If you see “sea foam” (large bubbles), your technique needs a tweak.
Mastering the Steam Wand for the Perfect Latte Froth for Pour
The steam wand is your primary tool, but it can be intimidating. It hisses, it’s hot, and if you aren’t careful, it can scream at you. Let’s break down the professional technique into manageable phases.

Phase 1: Aeration (The Stretching Phase)
Start with a cold stainless steel pitcher filled to just below the start of the spout. Purge your steam wand for a few seconds to clear out any condensed water.
Submerge the tip of the wand about 1/4 inch (or 1cm) below the surface, slightly off-center. Turn the steam on full blast. You should hear a gentle “tssss-tssss” sound, similar to paper tearing. This is the sound of air being pulled into the milk.
- Pro Tip: If you hear a deep roar, the wand is too deep. If you see big bubbles splashing, the wand is too high.
- Temperature Check: Continue this until the pitcher feels lukewarm (about 40°C or 100°F).
Phase 2: Texturing (The Rolling Phase)
Once you’ve added enough air, bury the wand tip slightly deeper and angle the pitcher to create a vortex or whirlpool. This is where the magic happens. The spinning motion takes those larger bubbles you just created and shreds them into microscopic ones.
Hold this position until the pitcher becomes uncomfortably hot to hold. We are aiming for a final temperature of 65-70°C. Do not exceed 71°C (160°F), as the proteins will break down, the sweetness will vanish, and you’ll be left with a burnt taste. For more specialized advice, check out More info about coffee brewing hacks.
Phase 3: Pitcher Grooming
Once the steam is off, wipe the wand immediately (don’t let that milk crust!) and purge it again. Now, look at your milk. If there are a few stray bubbles on top, give the pitcher a firm tap on the counter. Then, swirl the pitcher vigorously. This “polishes” the milk, integrating the foam and liquid into that famous wet-paint consistency.
The Physics of the Pour: Height, Speed, and Placement
You have the perfect latte froth for pour, and your espresso has a rich, golden crema. Now comes the “dance.” Latte art is essentially a game of physics involving surface tension and flow rate.
| Action | Purpose | Result |
|---|---|---|
| High Pour (7-8cm) | Pierces the crema and goes under | Sets the base without marking the surface |
| Low Pour (1cm) | Floats the foam on top | Creates the white design on the brown canvas |
| Fast Flow | Pushes the foam forward | Expands the design (like a heart or rosetta) |
| Slow Flow | Keeps the design small | Useful for fine details or finishing |
The “Dive” and the “Float”
Start by tilting your cup at a 45-degree angle. This increases the surface area of the espresso. Pour a thin, steady stream from about 7-8cm above the cup. Aim for the deepest part of the espresso. This “dives” the milk under the crema, filling the cup while keeping the surface brown.
Once the cup is about half full, bring the spout of the pitcher as close to the surface as possible (almost touching the crema) and increase your pour speed. This “floats” the white foam onto the surface. As the cup fills, slowly level it out to prevent spilling.
Timing Your Latte Froth for Pour
Timing is everything in coffee. As soon as you stop steaming, the milk begins to separate into “foam” and “hot milk.”
- The 10-20 Second Window: Research shows that frothed milk is at its most pourable about 10 to 20 seconds after you finish steaming. This gives the microfoam a moment to thicken slightly without becoming a solid block.
- The Swirling Technique: If you have to wait (perhaps because your espresso machine is slow), keep the milk moving. Swirl the pitcher constantly to prevent separation.
Single Boiler Hacks: If you are using a single boiler machine (where you have to wait for the machine to change temperature between steaming and brewing), we recommend frothing your milk first. However, use the 33% stretch rule: aerate the milk slightly less than usual, as it will naturally thicken while you pull your shot. Keep swirling that pitcher like your life depends on it! By April 2026 standards, this remains the most effective way to manage single-boiler workflow.
Creating the Heart with Latte Froth for Pour
The heart is the foundation of all latte art. If you can pour a heart, you can pour anything.
- The Base: Pour high to fill the cup halfway.
- The Bloom: Lower the pitcher to the center of the cup. Increase the flow. You’ll see a white circle begin to form.
- The Wiggle: Gently oscillate the pitcher side-to-side to help the circle expand.
- The Cut: When the cup is nearly full, lift the pitcher back up to a height of 2-3 inches and move it forward in a straight line through the center of the circle. This “pulls” the top of the circle down into the classic heart shape.
Troubleshooting Common Frothing and Pouring Mistakes
Even the best baristas have “bad milk days.” If your art isn’t looking quite right, it’s usually one of these three culprits.
1. “My design is just a big white blob”
This usually means your milk is too thick (over-aerated). You’ve created “cappuccino foam” instead of microfoam.
- The Fix: Reduce your aeration time. Only “stretch” the milk for 3-5 seconds, then focus entirely on the whirlpool to break down those bubbles.
2. “The foam just disappears into the coffee”
This is “wispy” foam, caused by under-aerating. The milk is too thin to float.
- The Fix: Listen for more of that “tearing paper” sound at the beginning of your steam cycle. You need more air to give the foam structure.
3. “My heart is off-center”
This is a placement and tilt issue. If you don’t level the cup as you pour, or if you aren’t pouring directly into the center, gravity will pull your design to one side.
- The Fix: Ensure your pitcher spout is centered and that you are gradually leveling the cup as it fills.
4. “The milk tastes flat or bitter”
This is a temperature issue. According to Research on milk temperature and sweetness, milk is at its sweetest around 60-65°C. When you hit 70°C+, the lactose begins to break down and the sweetness is replaced by a cooked, “eggy” flavor.
- The Fix: Use a thermometer until you can accurately judge the temperature by the feel of the pitcher.
Frequently Asked Questions about Latte Froth
Can I make latte art without a steam wand?
Yes! While a steam wand is the gold standard for latte froth for pour, you can achieve decent results with home hacks:
- French Press: Heat milk to 65°C, pour it into a French press, and pump the plunger quickly for 10 seconds, then slowly for 10 seconds. This creates surprisingly good microfoam.
- Battery Frother: These are great for foam but often struggle to create the “vortex” needed for true microfoam. Use a shallow bowl to help integrate the air.
- Jar Shaking: This creates large, soapy bubbles. It’s fine for a latte’s taste, but almost impossible for intricate art.
What is the best milk for latte art?
- Whole Milk: The undisputed champion. The high fat content (3.25%) creates a stable, creamy foam that is very forgiving for beginners.
- Oat Milk: The best dairy-free alternative. “Barista Edition” oat milks are specifically formulated with added stabilizers to mimic the protein structure of cow’s milk.
- Skim/Almond Milk: These are much harder to work with. Skim milk creates very “stiff” foam that is difficult to pour, while almond milk often curdles if the coffee is too acidic or the milk is too hot.
Why does my foam separate so quickly?
Foam separation (where you get a layer of dry foam on top of watery milk) is usually caused by:
- Poor Grooming: Not swirling the pitcher enough after steaming.
- Old Milk: Milk that is nearing its expiration date loses protein stability.
- Slow Pouring: If you pour too slowly, the liquid milk drains out of the spout first, leaving the foam trapped in the pitcher. Confidence is key—pour with a steady, medium flow!
Conclusion
Mastering the latte froth for pour is one of the most rewarding skills you can develop as a home barista. It transforms your morning routine into a mindful, artistic practice. At Reddoor Web, we believe that great coffee shouldn’t be a secret reserved for professional cafes. It’s about understanding the sensory cues—the sound of the steam, the feel of the pitcher’s heat, and the glossy sheen of the milk.
Don’t get discouraged if your first few attempts look like “abstract expressionism” rather than a rosetta. Even the pros started with blobs! Keep practicing, keep swirling, and most importantly, keep enjoying the process.
Ready to level up the rest of your brewing game? Check out More coffee brewing guides for our latest gear reviews and extraction tips. Happy pouring!
